
Settings and admin
Put checkout on your own website
Add a checkout link or embedded checkout to your website, and choose when the patient pays.
Questions people ask
Assessment-first or intake-first: which should I use?
Assessment-first to charge for the product only after a provider approves. Intake-first to charge right after intake.
Can I see which ad sent a patient?
Not on a GEN Health screen: see Track which campaign sent the patient.
Does a product hidden from the storefront still sell through a link?
Yes. Storefront only controls browsing; direct checkout links keep working while the product is active.
Where to find it
For links, open sidebar → Products (/products) and use the product’s link control. For embeds, open Settings → Developers (/settings/developers).
Access: Client Admin configures embeds. Client Admin and Client Staff can copy checkout links.
What you can do here
- Pick the right checkout link
- Add a Get started button to your site
- Embed checkout in your page
- Track which campaign sent the patient (UTM)
Pick the right checkout link
Use this for any "Get started" button. The three links differ in what the patient does first.
Open the links
On Products, click the link icon in the Actions column of an active product.
Pick the flow
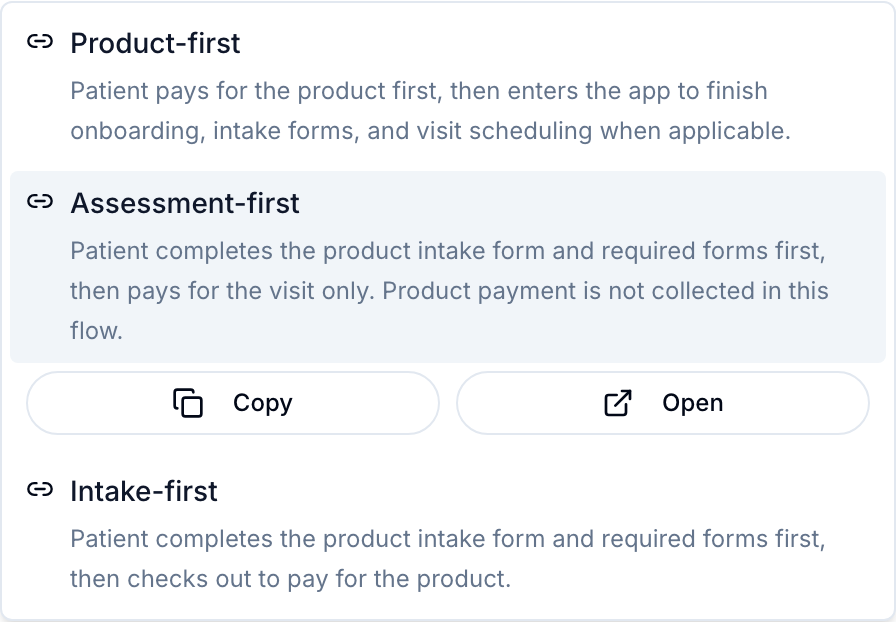
Product-first (checkout first): pay for the product, then intake. Assessment-first: intake, then pay only the visit fee; the product is charged later, if the provider approves. Intake-first: intake, then pay for the product.
Copy it
Click the flow, then Copy. Open previews it as a patient.
Check the result: the toast reads, for example, Assessment-first URL copied to clipboard.
Access: Client Admin and Client Staff.
In a clinic: for a "Book a consult" button, use Visits → Visit Options and the link icon on a visit: Visit checkout, Assessment-first or Intake-first.
Add a Get started button to your site
Works the same in Webflow, Wix, Shopify or WordPress.
Paste the link
Add a button in your website builder and set its link to the URL you copied.
Test it as a patient
Click it in a private window. If checkout says This checkout is in test mode. No live payment will be processed., set a processor on Settings → Payments.
Check the result: a test purchase shows up on Orders.
Access: whoever edits your website.
Embed checkout in your page
Use this to show checkout inside your own page. A developer does this.
Create a storefront key
Settings → Developers → API keys → Create key → Storefront key. Copy it from Copy your key now.
Allow your site
Key row menu ⋮ → Edit origins: in Allowed origins, comma separated, add your site's address, such as https://www.yourbrand.com, then click Save origins.
Paste the embed code
Copy the iframe example from Documentation → Hosted Checkout into an embed block: Webflow Code Embed, Wix Embed HTML, Shopify Custom Liquid section, or WordPress Custom HTML block.
Check the result: checkout loads inside your page and a test payment appears on Orders.
Access: Client Admin creates the key.
Only a storefront key goes in a web page, never a regular API key.
Track which campaign sent the patient
Use this to learn which ad brought each patient.
Tag the link
Add utm_source, utm_medium and utm_campaign to the URL, such as ?utm_source=meta&utm_campaign=spring (use & instead of ? if the link already has one).
Read them outside GEN Health
The tags are saved on the order and sent in order webhooks and the API. No GEN Health screen shows them: read them in your CRM or Zapier.
Tag an embedded checkout
When creating a storefront checkout session, your developer can pass an optional tracking field with source, utmSource, utmMedium and utmCampaign.
The values are added to the checkout link, saved on the order and included in attribution.tracking on order webhooks. See Documentation → Hosted Checkout.
Check the result: your webhook or CRM receives the order with the tags.
Access: anyone; reading webhooks needs a developer.
Selling online: to count campaigns inside GEN Health, give each one its own promo code. Reports → Coupon usage counts redemptions per code.
What can go wrong
| What you see | Why | Fix |
|---|---|---|
| The link icon is greyed out | Activate this product before sharing checkout links. | Activate the product from its row menu. |
| The link works but no money arrives | The processor is None (test mode). | Set a processor on Settings → Payments. |
| The embedded checkout stays blank | The storefront key is revoked, or your site isn't in its allowed origins. | Check the key is Active and the origin matches exactly, including https://. |
| The link is extremely long | Ad platforms add tracking parameters. | Copy a fresh link from Products. |
| Patients can buy only one product at a time | Checkout links sell one product. | Sell a package (Products → Create → Package), or build a cart with the V2 API. |
Related
Was this helpful?